Skeleton·ID: Virtual lab
The Virtual Lab has five different scenes:
- Case selector.
- 2D (cephalometric) landmarking.
- Articulation of the mandible to the skull.
- 3D (craniometric) landmarking.
- Skull-face overlay.
 Figure 1.Skeleton·ID Icons.
This manual will mainly focus in the 2D (cephalometric) landmarking scene, however, how to load new AM photographs will be explained in the “Case selector” section.
Case selector
| CASE SELECTOR OPTIONS | ACTIONS |
|---|---|
 |
Open a case file (investigation) that contains the AM and PM cases. |
 |
Open an AM case containing the photographs. |
 |
Open a specific photograph of the selected AM case. |
 |
Open a PM case that contains the 3D model of the skull. |
 |
Open a 3D model of the skull of the selected PM case. |
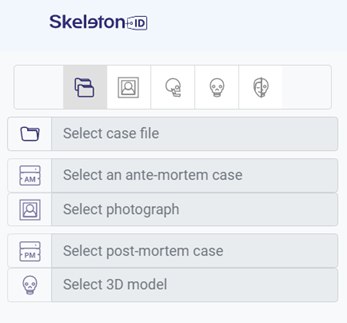 Figure 2. Options in the Skeleton·ID case selector.
Selecting the photograph work area
Using the “select work area” button  we can cut out the specific area of the photograph to work only with the face (Fig. 2). This cropping does not affect the proportions of the original image.
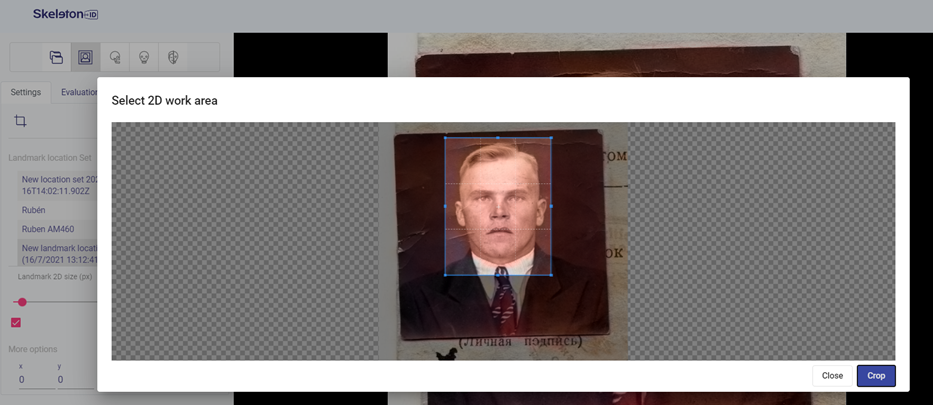 Figure 2. 2D work area selection.
Creating a new 2D landmark set
- After loading a photograph, a new landmark set will be created by default. To create a new set, the user should click on the three lines and choose “New landmark location set”.
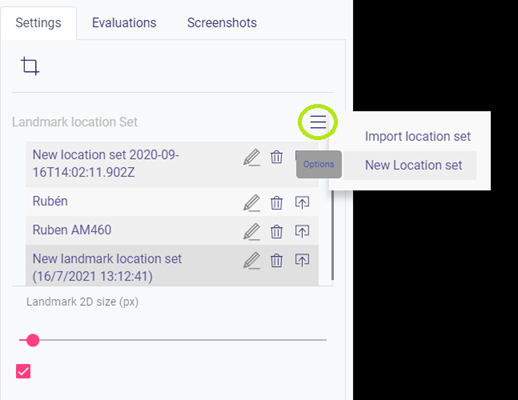 Figure 3. Create a new 2D landmark location set.
- A window will emerge in which the name can be entered and the reference landmark set can be selected (Skeleton·ID landmark set by default).
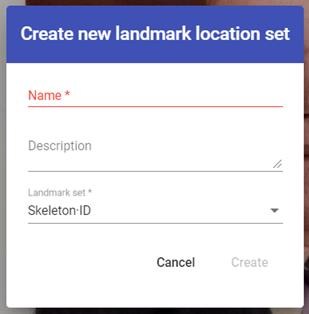 Figure 4. Landmark set creation options.
-
This feature allows for the creation of multiple landmark sets for different users to simultaneously work on the same AM photograph.
-
Clicking on the same three dots and then choosing “Import landmark set” allows to load a previously exported cephalometric landmark set.
-
The export button
 allows exporting and locally saving the selected landmark set.
Mouse controls
| CONTROLS | ACTIONS |
|---|---|
| Left click | Move the photograph |
| Right click | Display the landmark selector |
| Mouse wheel | Zoom in the image |
Auxiliary reference lines
After placing a cephalometric point, the vertical and horizontal auxiliary reference lines will be displayed (Fig. 5) and can be used to refine the marking. The lines can be moved by clicking on them and dragging the mouse. The inner circle can be used to rotate them.
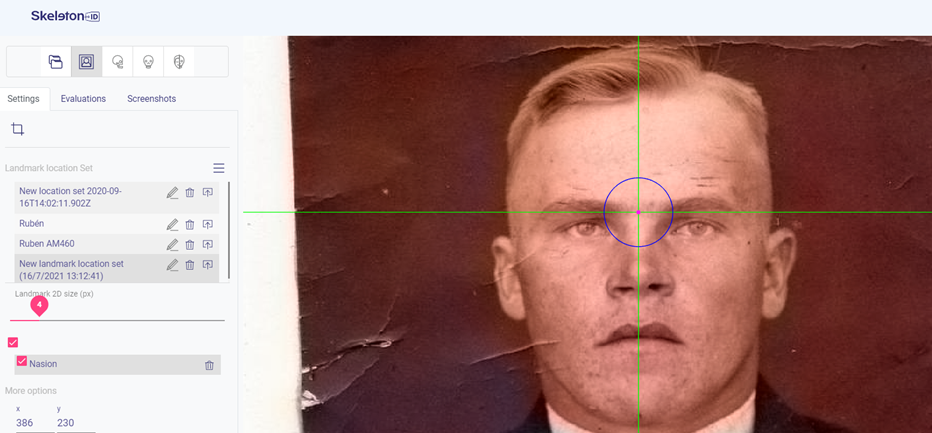 Figure 5. Auxiliary reference lines.